Pages

Tuesday, December 22, 2009

It's Just Not Perfect Enough!!


I do this to myself every year. I need to create the perfect Christmas for my family. I feel this need to decorate every corner of my home, I need to bake the best cookies and wrap my presents in colorful paper and bows. My tree must outshine the tree of the previous year. And I just discovered yesterday via a radio host what I'm suffering from: HPS. Sounds deadly doesn't it? It's not. It's treatable. If we want to treat it. The choice is mine to make. What is "HPS"? Most women suffer from this from Thanksgiving to Christmas and then it just goes away. It's known as "Holiday Perfection Syndrome". Do you have it? I know I do!

And yet, the other night when I was wrapping presents in front of the Christmas tree and watching The Nativity Story, I realized what Christmas was all about. It's not about the the size of the tree, or the number of presents under the tree. It's not about creating the perfectly decorated room (or rooms). It's about love, about giving, about sharing and....it's about reflecting on our blessings and the Reason For The Season.

I've made the choice that in these last few remaining days, I'm not going to worry about creating a perfect holiday. I just want to ENJOY Christmas and savor all that comes with it. Yes, I'm still a bit stressed, still have a few more gifts to buy, but I know in my heart it will get done. It will all come together just as it has all these years before.

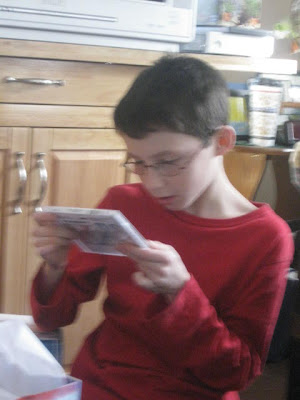
Last weekend, we had Christmas with the grandchildren because they're not able to see each other on Christmas Day. These kids are brother and sisters, torn apart and living separately due to the bad choices their mother made. My husband and I adopted Zachery, my step-daughter's son, the same year that my oldest granddaughter was adopted by my step-daughter's mother. The youngest girl lives with her dad. For many, many years, I hardened my heart towards my step-daughter, but accepted her into my home this Christmas season to enjoy the holiday with her children. We had a wonderful time which I hadn't expected and it felt good!---That is one of the reasons to celebrate!

And in anticipation of their visit, I did everything I could to create a beautifully decorated home. Of course, it wasn't Better Homes and Garden material, but I still wanted to create a perfect Christmas environment for my guests. And everytime I turned around to place a decoration here, a decoration there, I said to myself--"It's just not perfect enough!" And guess what? It didn't matter. The day was about being together and having a good time.

So maybe next year, I'll keep it simpler. For now, I just keep telling myself--"It is perfect, just the way it is!".




Wishing all of you a very Merry Christmas!!

I'm linking up with Deck the Halls at Thoughts From Over The Rainbow
Friday, December 18, 2009

Christmas Traditions


Today is the last day of the Holly Bloggy Christmas Bash and it has been so much FUN! I've found so many great blogs to visit time and time again and I hope that these gals will visit me as well. I've been so inspired by the array of ornaments--simple to elaborate; the assortment of crafts for all ages to enjoy; unusual handmade gifts; gorgeous trees and lastly--stories of traditions---those things that keep us rooted, that remain in our memories for many years to come and what we leave to future generations.

My family has many traditions, one of them being how we open our gifts each Christmas morning. When I was a child, the oldest (me) opened one gift and then went in order of birth with my dad being the last to open a gift. We continued like this until all the gifts were opened. This way we could all experience the joy of the recipient as well as seeing what they got. If we all opened our gifts all at once, it would be over in a matter of minutes and no one would know what anyone got. When I had children, I carried on the same tradition and we still do it. As a matter of fact, now that my parents have grandchildren, and we go down there for Xmas day, the youngest grandchild goes first and it goes "up" the line. Of course, because there are so many of us now, it can take quite awhile to open gifts, but we love it that way!
Another tradition we started about 10 years ago (maybe more) is cutting down our own tree from a local tree farm. We've always had a real tree, but once we moved to Maine and found out we lived so close to a Christmas tree farm, we took advantage of it. And although my girls are grown, they still want to participate. Once the tree is home, it's my husband's job to get it situated in the stand. Once it's exactly where I want it, it's my job to put the lights on. I put Christmas music on while Michael looks on. I already have my boxes and boxes of decorations sitting in the livingroom ready to be opened and put on the tree. My grandson, now adopted son, and my youngest daughter, sit back waiting for me to tell them that they can start. My husband always puts on a #8 fishing hook. Why? Because he loves to fish and that's his favorite hook. As we pull out each ornament, we think back on the story it holds, some of which I've already posted about.

On Christmas day, we open our gifts and then we put them aside to change and head down to visit my husband's sister in New Hampshire for a Prime Rib dinner. We've been doing that for 25 years now. We spend a few hours there and then we head down to Massachusetts to my parents home where the rest of the family is already waiting for us. No one opens gifts until we are all there to enjoy the magic...and mayhem!
All the grandchildren open their gifts from youngest to oldest and then they're off to play leaving the adults to enjoy a little bit of quiet and linger over our gifts. My sister and I are snapping pictures like crazy, trying to listen to a million conversations (I come from a big family), drinking wine, talking and ooohhing and aaahhing over the gifts. I love spending Christmas at my parents house.

Every Christmas, I create homemade gifts, scrap related of course! I also bake cookies and put together baskets for my sisters with an assortment of goodies. For years I've made ornaments as well, but not sure if I'll get to it this year.

Before we know it, the day has gone and we wonder where it went. So much preparation and stress and then it's over! I so wish the day would move slower. It's such a melancholy feeling for me as we pack our gifts into the car and drive back here to Maine. I sit back as Christmas carols, perhaps a few hours left until I have to wait 10 months to hear them again, play in the background and I think of what will happen in the coming year. And I thank God for giving me another great Christmas.

I'm wishing all of you and yours a very merry and blessed Christmas!

Michael pulling our tree (this year) through the lot.


An explosion box I made for my brother Andrew.

My mother and my sister, Sherri, last Christmas

I'm linking up with Cheryl at Tidy Mom who is hosting today's event. Thanks Cheryl!

Thursday, December 17, 2009

Yum! Chocolate Trifle-A Christmas Food Tradition


Hello Bloggers!
Today is Day 4 of the HOLLY BLOGGY CHRISTMAS BASH and the theme today is Christmas Recipes. This event is hosted by SIMPLY SWEET HOME. If you haven't done so already, stop on over and check out all the bloggers that are participating. There are so many wonderful trees to peruse, crafts to create and recipes to cook.

I am listing my recipe for CHOCOLATE TRIFLE. This has been a tradition for many years in our family. This dessert is delectable, delicious and fattening! But, who's counting calories at Christmas time anyway! If you're looking for something rich and tasty and a chocolate lover's dream, this is the recipe for you! Read On and Enjoy!

CHOCOLATE TRIFLE RECIPE:

INGREDIENTS:
1 (18.25 ounce) package chocolate cake mix
1 quart cold milk
2 (3.9 ounce) packages JELL-O Chocolate Flavor Instant Pudding & Pie Filling
1 (8 ounce) tub COOL WHIP Whipped Topping, thawed
4 (1.4 ounce) bars chocolate-covered English toffee bars, crushed

COOKING INSTRUCTIONS:

* Prepare cake batter and bake in 13x9-inch baking pan as directed on package. Cool completely on wire rack. Cut into 1/2-inch cubes.
* Add milk to dry pudding mix in medium bowl. Beat with wire whisk 2 minutes or until well blended.
* Layer half each of the cake cubes, pudding, whipped topping and crushed chocolate bars in large glass trifle bowl. Repeat all layers. Serve immediately or cover and refrigerate until ready to serve.

Yield: 18 servings

Wednesday, December 16, 2009

An Elegant Pine Cone style Ornament


Do you need a teacher's gift? Are you looking for something special for a friend, a neighbor or need extra gifts for a last minute gift? Then I believe this craft would be perfect! I'm linking with Blue Eyed Blessings Day 3 of the Holly Bloggy Christmas Bash. Today's theme is Christmas Crafts. So I thought I'd show you how to make a Pine Cone Ornament. Have Fun!

I made this ornament for a swap about a month ago and got rave reviews for it. It's fairly simple once you get going, but can be a bit time-consuming. I'd say it took me about 2 hours, maybe 3, from start to finish. Click HERE for the post on how to do this. This will show you pictures to along with the step-by-step directions. Thanks for looking!

Embellish the top with greenery, berries, faux pearl, etc.


If you have any questions, just post.

Tuesday, December 15, 2009

Our Christmas Tree


I'm showing off my tree as part of Holly Bloggy Christmas Bash and today's theme is "Christmas Trees", hosted by Jerri at A Baby Changes Everything. If you're not involved in this FUN holiday bash, stop on over and enjoy the fun for the rest of the week!

Every year, we go to a local tree farm and cut down our own tree. It's been a tradition for many years. And, even though my girls are grown, they still look forward to going as a family and choosing that perfect tree.

Over the years, I've collected many ornaments that just speak out to me. No, they're not collectibles by any means, they hold no value to anyone except me (and my girls perhaps), only sentimental value. They are precious, timeless and hold a story unique to itself. Our tree isn't the fanciest, nor the simplest either, but it suits me (although I do wish I had added more lights). As I browse through blogs and blogs of gorgeous trees and exclaim over the beauty of them and quite honestly wish at times that I could have a tree "just like that", I always glance back at our own and am satisfied.

I'm putting on the beading as we speak, but it's not shown in these photos. These were taken a day after we put the tree up on December 7th. Okay, I've been a bit slow in adding the garland. I have an eclectic array of ornaments on my tree--some going back to when my kids were little (they're now 21 and 24) and one very special ornament is still with me--one that I created when I was 11 years old (41 years ago!). Take a tour of the tree and enjoy!

This is a bread dough ornament purchased when my daughter was a year old. She LOVED her blankie and this was a perfect remembrance of it.

This ornament is from 1983 and was mine and my husband's first ornament as a couple, although in 1983, we were engaged, not married. It's a bit scratched and tarnished, but, hey, that describes our marriage!

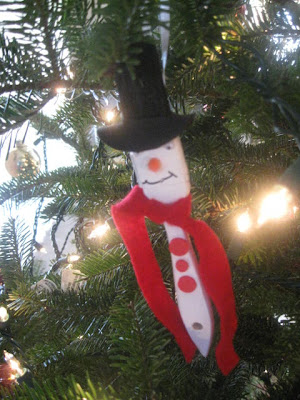
One of many hand-made ornaments created by the girls when they were in elementary school.

Jaclyn's (now 21) handprint santa made when she was 5:

This Santa is made from a paintbrush! Quite different I thought.

Valerie's snowflake ornament made when she was in first grade:

The girls each made one of these years ago while attending a children's Christmas Party:

This is my most beloved and oldest ornament on the tree. He was created by me 41 years ago when I was 11. He has moved many times and adorned many trees and yet, he has come through unscathed--not a scratch or break! He's made from a hollowed out egg, painted eyes, a cottonball for a beard and the trim and the cut off piece of my brother's hat (a baby at the time).

My husband makes one contribution to the tree and that is his #8 fish hook. He puts it in 'just the right spot', so when he's sitting on the couch, he can see it.

Valerie's bread dough ornament:


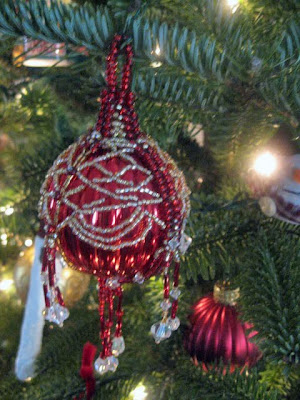
And then I have the more "elegant" ornaments. These were acquired through a swap and created by Susan Kyser. I'm a scrapper and paper artist and am always joining swaps. This was through Etsy Cottage Style and although we were to only swap one ornament, she sent me several! I love them and I display them proudly on my tree.


Thanks for looking at our tree.

Gingerbread Men Ornaments


Today is the 3rd day of the Holly Bloggy Christmas Bash (see button to the right of my side bar) and today it's all about Christmas Crafts. If you'd like to see other ideas, head on over to Blue Eyed Blessings and catch the fun!
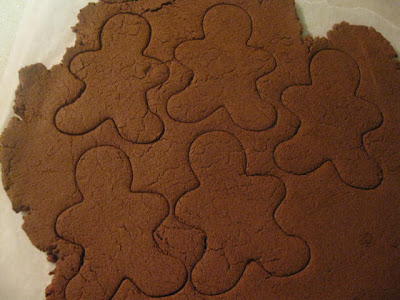
I started making gingerbread men ornaments last night after discovering that most of the ones I had made last year were busted up and falling apart. I needed to make more for my kitchen which always has a gingerbread theme. I'm also going to be making a wreath later. I keep my 'men' simple. I just make a dough (recipe follows), dry them for a few days and hang then as a garland in my doorway between the kitchen and DR/LR area. I don't have a photo of the finished project yet as they're still drying.

GINGERBREAD MEN RECIPE:
EASY GINGERBREAD MEN
(Makes 6 ornaments)
1/2c Applesauce
1/2c Cinnamon
2T Household glue

Mix all ingredients together and roll on wax paper to 1/4-inch thickness. Using a cookie cutter, cut out the shapes of the intended ornaments. Poke a small hole in the top of the ornament using the end of a straw, knife, chopstick, small dowel, pencil, or similar object. Allow ornaments to air dry for 1-3 days. When ornaments are ready to be decorated they will be completely dry and very hard.

I doubled the recipe because I needed more than 6. I did get about 13 ornaments.

**If you plan on using them as a garland, don't forget to poke holes in the 'hands' instead of at the top of the head. When adding the ribbon or fabric, insert from the front of "g-man's" right hand (your left), pull to the back (being very careful) and then come up through to the opposite hand. Continue in this fashion until you have the look and length you want.


I let the gingerbread men sit on a cookie sheet overnight and then transferred them to a drying rack so the air can circulate around them and (hopefully) dry them quicker. Be VERY CAREFUL transferring from cookie sheet to the rack as they may crack of fall apart. Good luck!

I did have two small garlands of gingerbread men salvaged from a few years back. Not the greatest pic, but it shows what you could do with them.

Good luck creating your own "G-Men".

Monday, December 14, 2009

A New Way To Present A Gift

Wouldn't it be nice to receive a gift or in my case a few small gifts in a box that is a gift within itself? As part of The Girl Creative Creative Christmas Blog Fest Day Four "Creative Gift Wrapping", I thought I'd submit my little idea.

This is a MAGIC BOX. It's not done in Christmas Paper for this particular posting because I had actually posted it several months ago when I first created it. I just thought I'd save time and re-upload it. Hope you don't mind. Anyway, this is a paper crafted box designed to look like a wrapped gift and when opened, reveals 4 smaller boxes that you could put small gifts into. I did find one fault when I was making this. The template does not have a way of keeping one of the sides closed tight. The cover holds all four sides together so as not to open up, but if you make one, you might notice that one 'seam', might peek open just slightly.

A MAGIC BOX

I am a scrapper and paper artist and so most of my gifts are paper-related. This is perfect using Christmas themed paper and then hiding a small gift in each 'drawer'. Enjoy!


I found this tutorial at Life as Lou blog about 9:00 last night and thought: "Hey, I can do that!". It's not that difficult, either. I used the Blossoms and Butterflies stack (DCWV) and followed the directions on her blog. It probably took about 1 1/2 hours to make--not too bad. I'm sure as I make more, it won't take so long. She also has a great tutorial on Explosion Boxes. I have made those in the past and they make beautiful gifts. Her blog is wonderful! Hop on over and check it out. Here's the LINK If you make one, let me know-I'd love to see it!

Below is what the box looks like opened up. There are four 'drawers'(my word) to store goodies.


Looking down to see the inside of the boxes. I cut a 2 3/4" square (which is not mentioned in the directions) to dress it up a bit. Leah (Life as Lou) did the same in her examples.


Oh, the only thing I would've done different was to use a two-sided sheet for the outside of the box. This was a 'learning' experience. Also, the purpose of the ribbon is to help keep the box closed. When the box is closed, there is an open 'seam' that is somewhat noticeable if it's not tied closed with a ribbon.

This was such a FUN project! Have a great day! Thanks for stopping by my blog.

Sunday, December 13, 2009

Christmas Tour aka Christmas Blog Hopping!


Ahhh, my favorite time of year! I just LOVE Christmas and all that comes with it, including the stress! Okay, I could do with a bit less stress, but other than that, I love decorating my home in anticipation of the big day! I'm linking up to Julia of Hooked On Houses "Holiday House Tours" and The Nester "Christmas Tour of Homes" on December 14th ; and Melissa's The Inspired Room's "Holiday Linky Friday". I'll probably be joining more, but for now, I'm happy to be joined up with these great ladies!

So, without further adieu, here is my simple home, simply decorated for Christmas. I hope you are inspired in some way. Thanks for stopping by!

This Santa is the oldest and beloved of all ornaments on my tree. Why? Because he was made by my simple hands when I was a girl of 11. He has moved many times with me over the years and is still unscathed! It's a miracle! He is made from a hollowed out egg, a cotton ball for the beard and trim and a chin piece from my baby brother's hat at the time. I look at this and remember the day that I created him so many years ago....

The tree isn't quite complete. I need to add my beaded garland and more ornaments. I wish I had added more lights as well, but it's too late now.

A recently acquired ornament that was handmade by Sharon Kyser. I just LOVE it!

The next two paper ornaments were also created by Sharon for a swap in which we were partners:


Below is a Santa standing by an antique coffee cart on which sits my vintage nativity set:

Ornaments in a cut glass bowl:

An antique side table covered with my collection of Snowmen. Below the table are my soft dolls--santas and snowmen--each of them holds their own story as well.

My Santa collection:

A snowflake garland in my dining area:

My Nativity Set is 25 years old. My mother bought it for me and my husband for our first Christmas.


This angel watches over me in the scrapbook room:


My husbnad loves to fish and this is his contribution to the tree every year!

This ceramic tree and angels were made by my sister years ago. They sit proudly on my hutch in the dining area:


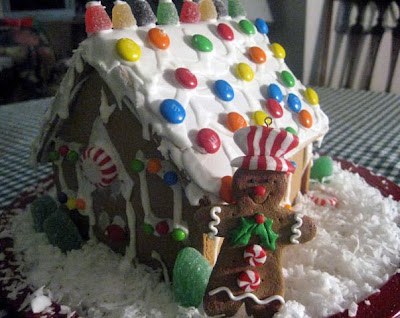
This gingerbread house sits on the dining room table proudly made by my daughter.


The Gingerbread House my daughter made. The gingerbread people or non-edible and purchased at the dollar store.


Here's the kitchen. I'm still decorating this room. I plan on making a gingerbread garland to go between the kitchen and the DR/LR area. These gingerbread men hang between my two kitchen windows above the sink:

These g-men hang from my kitchen curtains above the sink:


And here is a ceramic pie plate, bowl and 'steam' bear (you put him in the center of the pie to release steam is what I've been told). I don't use it for actual baking. Any ideas on how I could 'spruce' it up? I also hang my Xmas mugs along the wall:


That's it for now. I'll be posting more soon. Thanks for stopping by,

Lori