Friday, October 15, 2010
Gloucester's Haunted Castle
In celebration of Vanessa's Haunted Halloween Party over at A Fanciful Twist --http://afancifultwist.typepad.com, I thought I'd share a place that I've once visited, used to drive by several times in a week when I lived in Gloucester, Massachusetts.
Gloucester's Haunted Castle
Hammond Castle was built in the 1920s by American Inventor John Hays Hammond Jr. Hammond holds the second largest number of invention patents next to Thomas Edison. He was a very wealthy man. His fascination with historical European culture led him to include many artifacts from old Europe in the furnishings - he even incorporated ancient tombstones inscribed in Latin and had them made parts of the walls. There are many ghost stories about Hammond Castle. Some think that Hammond brought spirits into the house along with the artifacts he collected. Others think that Hammond and his Wife summoned the spirits through their experiments with Spiritualism.
Even if you don't see a ghost during a visit to Hammond Castle, the site has plenty of eccentric features to entertain. Among the features are a working drawbridge, the tomb of a child from ancient Rome, the skull of one of Christopher Columbus's crewman, an eighty-five foot tall pipe organ (the largest ever installed into a private residence, an indoor swimming pool complete with facades taken from Medieval European storefronts and many, many historical artifacts.
The Cats of Hammond Castle
During their lives at Hammond Castle, John Hammond and his Wife, Irene had dozens of pet cats. Whenever one would die, Hammond would preserve the cat in formaldehyde. He would then lead a slow vehicular funeral procession around Cape Ann that would start and end at the castle. Ultimately the preserved feline would wind up in the master's future burial vault, much like an Egyptian pharaoh taking his pets with him into the afterlife. The burial vault is on the property.
John Hammond expressed a wish to be reincarnated as a cat. Some believe that Hammond did indeed return as a black cat that lived on the grounds in the years after his death. The stray chose the place to live and frequented the stone Bishop's Chair that Hammond liked to sit and smoke in.
The Dead Spot
There is a section of floor in the main hall of Hammond Castle that is bleached lighter then the rest of the floor. This is the result of the Hammond's experiments with Spiritualism. John Hammond created an elaborate Faraday cage that surrounded psychic mediums with an electrical field during seances. The concept was that the electrical field would keep out psychic impressions of the living around the medium and only allow in the spirits. The electrical field bleached the floor where the cage once stood. Some say that the "Dead Spot" has focused the energy of the castle's spirits into this small area.
The Supernatural at Hammond Castle
Items have been known to disappear, reappear, or be moved by unseen residents. There is a spectre who sometimes appears in the organ loft. Workers at the castle hear voices when nobody else is around. A ghostly red-haired woman occasionally appears amongst guests at weddings held at the castle.
Castle of the Damned
During the Halloween season, Hammond Castle is transformed into the haunted attraction, Castle of the Damned. The annual Halloween haunt is put together by an interactive theatrical group that aspires to provide more than the traditional haunted attraction. The attraction varies from standard methods of scaring its guests and relies on more visceral means (through haunting images and scenery) to leave a more lasting horrific impression on those who pass through.
Sometime soon, I'm going back down to my old stomping grounds and visit Hammond's Castle. Another stop that's a must for anyone at Halloween----SALEM! The home of the Salem Witch Trials. But that's another story for another day. I hope you enjoyed this post and hope you get the chance to visit this truly unique castle.
Thursday, October 14, 2010
Prepping for a Craft Fair
I'm gathering supplies and doing my best to get some papercrafted items ready for a craft show that I'll be doing on November 14th. It'll be my first craft fair and I'm a bit nervous. I've got lots of ideas brewing and want to make so many things, but I have so little time left. I didn't find out until 2 weeks ago. But, this is one item I'll be making:
An Altered CD Case
When opened it reveals an accordion album!
Psstt....I'm still in the process of creating the pages on the inside.
I also plan on making mini albums, altered journals, paper pinecone ornies; and so much more!
This is a short post, but I'll be posting again soon.
Monday, September 27, 2010
Home-Made Applesauce
Ahhh, Fall----the time of year when apples are picked and I get to make apple pies, apple sauce, apple crisp and anything else that calls for apples! Yesterday, the kids and I met up with my father to go apple picking at McDougal's Orchard. It was cloudy and started to drizzle near the end of our venture, but we picked quite a bit.
This morning, my daughter and I decided make Home-made Apple Cinnamon Sauce. Right now the house smells sooooo good! This is an easy, simple recipe.
Slow-Cooker Applesauce
Ingredients:
Apples--4 medium sized
Brown Sugar--1/4 Cup
Cinnamon--1 tsp, ground
Nutmeg--1 tsp, ground
Water---1/4 Cup
Directions:
Peel the apples, then cut using an apple corer
Mix brown sugar, cinnamon, nutmeg and water in slow-cooker
Add apples, stir, then cover
Turn cooker on high and cook for 1 1/2 to 2 hours
Stir well, breaking up the apples (I used a potatoe masher)
Cover, reduce heat to low and continue cooking for another 1 1/2 to 2 hours.
Check the sauce occassionally and break up or mash to the consistency you want
Let cool and serve warm or store in the fridge to serve cold
Makes about 5 servings
Nutritional Info:
Fat: 0.6 g
Carbs: 28.1 g
Calories: 110.0
Protein: 0.3g
Enjoy!
Saturday, September 4, 2010
It's That Time of Year!
Well, it's that time of year when the weather gets cooler, the leaves change color and it's time for.....CRAFTING! I'll be doing more crafting as the holidays approach. I've also been invited to participate in a craft fair to be held in November. Matter of fact, I need to look into other craft fairs as well. So, check back and see what I've created!
Sunday, August 22, 2010
Okay, Enough of Ignoring This Blog
I have been so neglectful of this blog because I'm giving so much of my time and energy to my Scrapmom's Musings Blog. I was considering putting everything into one blog, but felt it would be too overwhelming. Oh well. So.....today I vow to keep this blog updated at least on a weekly basis with things such as recipes, crafts, and living my life in Maine. I hope you'll come back often and enjoy what I'll be offering. Thanks!
So, where to start? I think I'll share some of my yard sale finds.
This is a dresser that I picked up for $3.00!! I need to repaint it, but I might keep it white. I'd like to add some flowers or something to it. Not sure yet.
This is a wooden shelf and a metal "thinga-ma-jig" that I'll use somewhere in the house. I always buy stuff when it strikes my fancy, bring it home and then wonder what I'm going to do with it! I think the wooden unit will go in the kitchen. I'm not sure if I'll keep it as is or paint it. I collect all kinds of country goodies, so I'll use this to display them.
And the item below I bought for a $1.00 and plan on keeping this in my scrap room. The items inside were also purchased at the yard sale. I like it as is as my scrap room has a Rose theme.
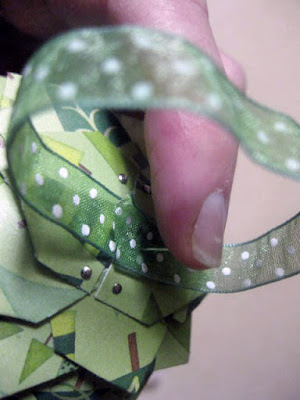
This will be used to display little odds n ends that appeal to me. They might not be scrap-related--just things that make me smile.
And this is an old jewelry box that I thought would be perfect on my work table in my scraproom to hold small embellishments. I definitely have to change the color!
Thanks for looking and come back soon!
Wednesday, May 19, 2010
Sorry I haven't posted
I'm doing my best to post on both blogs--this one and A Scrapmom's Musings. I've been blog hopping---again---and have discovered some more great blogs! I just found The Thrifty Home and grabbed her button. Check her out--she has a wonderful blog! I also found Hope Studios. Still blogging along in search of some more great blogs.
Anyway, today is quite rainy and a great day to stay inside, but I have to go to work later. The last 2 days were gorgeous and I spent them planting my flowers. I still have a few more to plant, but 80% of it is done. I'm a bit nervous though that they'll survive the next 2 weeks as we still have a chance of getting another freeze. My fingers are crossed. Wish my flowers luck!
I'm also preparing for uploading some more crafty stuff. I'll post when they're completed. For now, I thank you for stopping by. Have a wonderful Wednesday!
Saturday, May 8, 2010
My Creations from the last few months
I haven't done any crafting since Christmas. I've been scrapping and creating mini albums--a new obsession of mine. I belong to the TWS (Trade Wind Scrappers) on Life on the (Scrap) Beach and we swap a mini album that we've created with a swap partner. I've been involved for 4 months now and love it! Here's a pic of my mini's.....so far.
Above is the album I created for Dawn Edwards for the month of February. The theme, of course, was Love.
This is the album I made for Charlene Gibson for the month of March. The theme was "What makes me happy".
The above is the most recent mini I finished for Pat in the UK. The flowers on the this cover were created by me, except for 3 of the 'flatter' ones, which I believe are Primas.
This is a paper rose that I made a month or so ago--so easy to do!
Here's an altered box that I made for a swap in February. Below is the inside of the box:
This is a toilet paper roll mini album for the Go Green swap over at Scrapper's Delight back in March. This was made entirely from scraps and of paper and packaging materials as well as odds n ends found around the house.
That's about it for now. I'll be working on other items, so check back!
Friday, April 2, 2010
How Could I Be So Neglectful?!
I have been so busy with my blog, A Scrapmom's Musings, that this blog has gone by the wayside. I just haven't done any other type of crafting other than scrapping, so I've just ignored this blog. The beginning of February found me becoming a DT member to two sites: Scrapbooking and Crafting Friends and Creative Scrapbooking Divas. There's alot to do on both sites and I've just been busy!
I will do my best to keep up with this blog. As a matter of fact, I'm just putting the finishing touches on an Easter Basket that can actually be used for birthdays, Mother's Day, Father's Day, Graduation, baby showers, bridal showers, etc. just by changing the paper! I'll post the finished project within the next few days.
So, that's about it for now. If you want to see what I've been up to, hop on over to A Scrapmom's Musings.
Have a Wonderful Easter Weekend!
Thursday, January 21, 2010
I've been neglecting this blog
Sorry I haven't been here. I've been so busy updating my scrapping blog and just creating for challenges, swaps as well as making layouts for DT challenges, that I've sadly neglected this blog. I haven't really been crafting since Christmas. I did find some interesting blogs that I listed to the right but that's about it. I'm going to be creating a lovely gift for a Valentine swap and will post that as soon as it's complete.
Keep Creating!
Keep Creating!
Wednesday, January 6, 2010
I Sold Two More Pinecone Ornaments!
I just sent off two more of my paper pinecone ornaments! I sold them for $10 each, but I should've charge more due to the time it takes. The supplies are not expensive at all---it's just time consuming. If you've never made one, I'll provide the tutorial below. I also have this uploaded to my other blog A Scrapmom's Musings. They were ordered by a co-worker of my daughter's and she loved them! I'm thinking of making more and uploading them to my Etsy store (which has been sadly neglected).
Here's the other one:
Here is what the top of the ornaments look like:
The above is the top of the red ornament. Below is the top of the green/white one:
Okay, now as promised, here's the tutorial if you're interested.
Materials:
* One (1) 12x12 sheet of patterned paper
* One 3" styrofoam egg
* 18" length of ribbon to match (not shown)
* Dressmakers Pins--also known as bridal or lace pins or even 'common' pins
* Glue Gun
* 12 inch cutter
* Assorted greenery, faux berries, faux pearls, or other embellishments (optional)
1. Start by cutting your pattern paper into 1" strips (1" x 12").
2. Trim those strips into 1 inch pieces. Each piece should measure 1"x1". You will use most, if not all, these pieces depending on how tight you layer your pieces.
3. Next, take your 1 inch squares and fold in the two edges of one side to create a triangle. There should be about a half inch, perhaps slightly less, on the opposite side. I fold all my squares so when I start layering, I'll have plenty.
4. Now you're ready to place these triangles onto the styrofoam egg. Tip the egg so the narrowest part is facing up. Place two triangles with the tips touching at the base and pin in place using the dressmaker pins. You want to place the pins near the very edge and at the corners so they're hidden by the next layer. Next, add two more triangles at the tip to create your first 'row'. See photo below.
5. Continue to layer the pieces, overlapping the triangles as you go around the egg. Make sure you're covering up the pins from the previous row.
6. Keep layering the pieces, as in step 5, and continue in this circular movement until you reach the 'bottom' of the egg, which once decorated is actually the 'top' of the egg, but for layering purposes, I'm calling it the bottom....for now.
This is how it should look:
7. The top might be a bit confusing, but just pin the triangles on until there isn't any white showing. Don't worry about the pins being exposed on the top--these will be covered up by the ribbon and embellishments.
8. Cut your length of ribbon into one 8 inch piece and two 5 inch pieces.
9. Make a large loop using the 8 inch piece and pin the ends to the center of the egg as shown. This is the loop that will be used to hang the ornament.
10. Make 2 smaller loops with the 5 inch pieces, criss-crossing them in the center of the loop and pinning in place.
11. Using the glue gun, add your greenery, faux berries, and other embellishments if you choose. I do this because I think it adds more elegance to the ornament. Have fun with creating your ornament and make it as personal as you like. Put your personality into it.
Here is an example of the finished ornament:
I plan on uploading more crafty tutorials as time allows. I should have another posted over the weekend, or beginning of next week. I need time to get the project done in order to photograph it in steps. Thanks for understanding.
Enjoy!
Friday, January 1, 2010
HAPPY NEW YEAR!
I'm wishing all of my followers and visitors and very Happy New Year! May it find you healthier, happier and prosperous. I'm not one to make resolutions because I always feel guilty if I don't follow through, but I have made some 'plans' for the upcoming year.
One plan is start uploading more craft tutorials on this blog because, afterall, that's what this blog is all about. So, if I'm not here for a few days, it's because I'm creating and looking for great crafts to share with you.
I'm heading off to work today but for the most part, my morning will be spent taking down the tree. It's a melancholy experience and as I pack the ornaments away, I think back to the day I unwrapped them to hang on the tree several weeks before. But, I'm also looking forward to having my house back to where it was and getting back into my usual routine.
So, my friends, again I wish you a Happy New Year!
Subscribe to:
Posts (Atom)